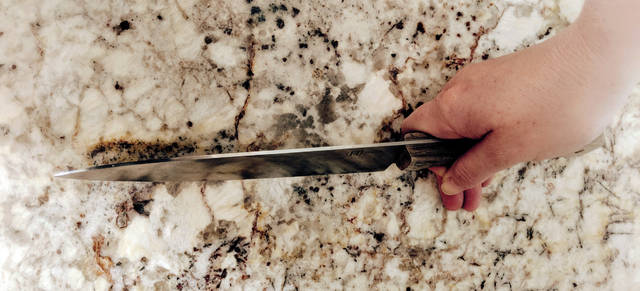
My first kitchen job wasn’t so scary, but learning how to use a knife and keep the job terrified me. Talk about the pot calling the kettle black. I knew it didn’t make sense to be fearful of the treasured tool of my mentors. That lack of confidence was finding it’s way onto my cutting board again and again. My job required a lot of on the spot slicing and dicing of fresh veggies and meat. Every second effected entire orders, effecting servers’ timing and table flow.
I must have looked like a deer in headlights, my Sous Chef came over to my station the second week on the job and simply said,”let me show you something.” He took my knife, and in one quick gesture forever changed my life. My nervous hands hadn’t been holding my knife correctly. This simple reassessment gave my cuts confidence, took pressure off of my wrist, and allowed me to finally look like I knew what I was doing. This confidence helped me to be a little less fearful. I still have the occasional error, but learning how to do things correctly has allowed my fear to to dissipate. It’s good to be a little bit afraid sometimes when we allow it to become awareness. When working with knifes it is important to always be cautious and aware, most importantly, not sloppy.
Today I am going to share with you a few basic knife placement techniques and recipes to practice them with. Practice the basic, and after you get more confident, step up your game with another technique. This will help your control grow and align your wrist, palm, and fingers a little more at a time. There are so many amazing resources and visuals out there. There are always new tricks on the internet and in cooking magazines, or even todays paper.
Good luck and enjoy!
–
Gripping a Knife: Basic Tips a) Wrap your thumb and index finger around handle, placing thumb just beneath the handle bolster. Wrap your index finger around the handle from the other side of the knife. Bend both fingers closer until they touch. b) Curl the other fingers onto the handle. Wrap your middle, ring, and pinky finger all the way around the handle, keeping them aligned with your index finger.
c) Hold your fingers close together to provide the greatest amount of grip and force. Ideally, there should be no visible space in between your fingers while they are gripping the knife.
d) Keep your hand firm. Cut food while keeping a firm grip around the handle. No finger should move beyond the bolster as you cut.
–
Shaved Chocolate Block Fudge Sauce
Tip: Use your chef’s knife to apply pressure to the spine or back of the knife as you shave off thin or thick shards. If the pieces are to large, just dice them up. Don’t use the tip of the knife, it may snap or slip. Set the heel of the knife near the edge or corner of the chocolate and apply pressure.
Combine 1/2 cup heavy cream, 3 tablespoons light corn syrup, 1 cup Dutch-processed cocoa powder and a pinch of sauce in a small saucepan. Bring to a simmer over medium heat, whisking to dissolve the cocoa powder. Remove pan from heat.
Add 4 ounces of bittersweet chocolate, chopped medium fine so that it is crumbling at the touch. Whisk into mix until melted. Whisk in 1/4 tablespoon vanilla. Serve immediately or let cool slightly for a thicker consistency.
Pairs wonderfully with any desserts, but especially cool summer fruits or ice cream.
–
Bread & Butter Pudding w/Bourbon and Crystalized Ginger.
Serves 6-8 Preheat oven to 350 degrees
Tip: Use a serrated knife to cut up bread. Dark rum or other liquor is also a delicious substitute.
4 tbsp unsalted butter, softened
1, 12 ounce, loaf of Italian bread, cut into slices one inch thick 4 large eggs
1 1/2 cups heavy cream
1 teaspoon vanilla extract
1 tablespoon Bourbon
large pinch kosher salt
1/3 cup course chopped crystalized ginger
2 teaspoons turbinado sugar (any course brown sugar will work)
Spread butter on each slice of bread, on each side. Cut slices into 1 inch strips, followed by 1 inch cubes. This should provide you with around 12 cups. Set aside.
Combine eggs, milk, cream, sugar, vanilla, Bourbon, and salt in a very large bowl. Whisk until well blended. Add bread and gently toss until all cubes are coated. Sprinkle on ginger and stir mix. Pour mix into an 8 cup baking dish (7×11). Spread mix evenly filling to the rim. Allow mix to stand for 10 minutes. Make sure all bread is under mix. Push what bread is sneaking up down with the back of a very large spoon.
Sprinkle sugar evenly over bread. Bake for one hour or until pudding has puffed. The top will be golden brown and the knife inserted into the center will come out smooth. Allow to stand for ten minutes when removing from oven. Serve warm.
–
Pico de Gallo (Vegan)
Tip: Use a Chef’s knife if you are comfortable but a pairing knife will also work wonderfully. Want to mix it up a bit, add a little avocado. (Delicious on meat, tacos, chips, or even a salad.)
1 cup red onion, finely chopped
1 jalapeño pepper, seeded and finely chopped
2 limes, juiced
2 1/2 cups Roma tomatoes, chopped
1/2 cup chopped fresh cilantro
Mix red onion, jalapeño paper, and lime juice in a bowl. Allow to stand for 5 minutes. Mix in Roma tomatoes, cilantro, and salt; allow to stand 15 more minutes for flavors to blend.
–
The recipes and photos used in todays article are from the kitchen of Chef Babz Goldman ([email protected]) with a little help from Knives Cooks Love, Sarah Jay for Sur La Table, 2008.


